
|
|
Version
Table of Contents
1.2 What you need to know with this book 3
2.4 openCRX Server Installer 5
4.1 Starting openCRX Server 11
4.3 Stopping openCRX Server 11
List of Figures
List of Listings
1 About this Book
This book describes how to install an openCRX Server with the IzPack cross-platform installer (works on Windows, Linux, Mac OS, etc.). Please note that this is a guide to set up a runtime environment suitable for evaluation and testing purposes. If you intend to use openCRX in a production environment it is recommended that you migrate (see Wiki) to one of the recommended database management systems.
openCRX is the leading enterprise-class open source CRM suite. openCRX is based on openMDX, an open source MDA framework based on the OMG's model driven architecture (MDA) standards. This guarantees total openness, compliance with all relevant standards, a state-of-the-art component-based architecture, and virtually unlimited scalability.
1.1 Who this book is for
The intended audience are openCRX administrators and advanced users interested in evaluating openCRX.
1.2 What you need to know with this book
This book describes how to install openCRX with the IzPack installer, which takes care of all the tricky configuration issues for you. The prerequisites are minimal (JDK and Apache Ant) and once they are met you should have openCRX up and running in less than 5 minutes.
1.3 Tips, Warnings, etc.
We make use the following pictograms:
|
|
Information provided as a “Tip” might be helpful for various reasons: time savings, risk reduction, etc. - it goes without saying that we advise you to follow our guides meticulously. meticulous
\muh-TIK-yuh-luhs\, adjective: |
|
|
You should carefully read information marked with “Important”. Ignoring such information is typically not a good idea. |
|
|
Warnings should not be ignored (risk of data loss, etc.). |
2 Prerequisites
2.1 JDK 6.0
Install OpenJDK JDK 6 (http://openjdk.java.net/) or Sun Java JDK 6.0 (http://www.oracle.com/technetwork/java/javasebusiness/downloads/java-archive-downloads-javase6-419409.html#jdk-6u33-oth-JPR)
|
|
You really do need Java 6, i.e. Java 4, Java 5 or Java 7 will not work. On the Mac you should probably use the JDK provided by Apple. |
|
|
It is not sufficient to have a Java Runtime Environment (JRE) only. The full-blown JDK is required to run openCRX. |
|
|
On Windows, it is a good idea to avoid paths containing blanks like the default installation directory ...\Program Files\.... |
|
|
Don't forget to set the environment variable JAVA_HOME. It should point to your JDK installation directory, e.g. to D:\Java\jdk1.6.0 on Windows or opt/jdk1.6.0 on Linux. On the Mac you have to make sure that the default JDK is set properly because there are quite often multiple versions of Java installed. The following script will make it easy to switch between the various versions installed on a Mac (credit to “unknown” who provided this nifty solution): Create a text file like "switchJDK.sh" and make it executable (can be done by executing chmod +x switchJDK.sh). The file should have the following content: #!/bin/sh Now you can switch between your default JDK in seconds. Simply execute the script (e.g. ./switchJDK.sh 1.6.0). If you run it without parameters it will show you the JDKs installed. |
2.2 Ant 1.8.4
Download Ant 1.8.4 (available from http://ant.apache.org/) for your platform and install it by expanding the downloaded file to a directory of your choice.
|
|
Don't forget to set the environment variable ANT_HOME as follows: ANT_HOME should point to the installation directory of Ant, e.g. D:\apache-ant-1.8.4 on Windows or /opt/apache-ant-1.8.4 on Linux. |
2.3 Unzip
In case there is no unzip command line utility installed on your system (e.g. clean install Ubuntu) you should install such a utlity to avoid installer errors of the sort Cannot run program "unzip".
2.4 openCRX Server Installer
Download the openCRX Server Installer opencrxServer-2.10.0-installer.jre-1.6.jar from Sourceforge: http://www.opencrx.org/downloads.htm
The openCRX Server installer installs Apache TomEE, the openCRX EAR, an openCRX database (HSQLDB) and various configuration files on your system.
|
|
Please note that HSQLDB is not exactly a high performance DBMS nor is it meant to be used as a productive DBMS for openCRX. However, it gets lots of points for “ease of installation” and that is what counts for getting off the ground fast. Once you're comfortable with openCRX you can easily migrate to another DBMS without losing any data. More information about choosing a suitable DBMS and migrating from HSQLDB to another DBMS is available here: |
2.5 Hardware
We recommend a decent CPU and at least 2GB RAM. More detailed information about the requirements of openCRX are available from http://www.opencrx.org/faq.htm#hardware
3 Installing openCRX Server
Open a console (Terminal window, DOS window, etc.) and navigate to the directory that contains the openCRX IzPack installer.
Launch the installer with the following command:
java -jar opencrxServer-2.10.0-installer.jre-1.6.jar
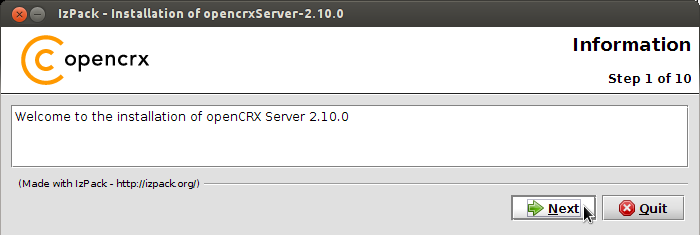
(use the option -console to launch the installer in text mode)Click [Next] on the following screen:
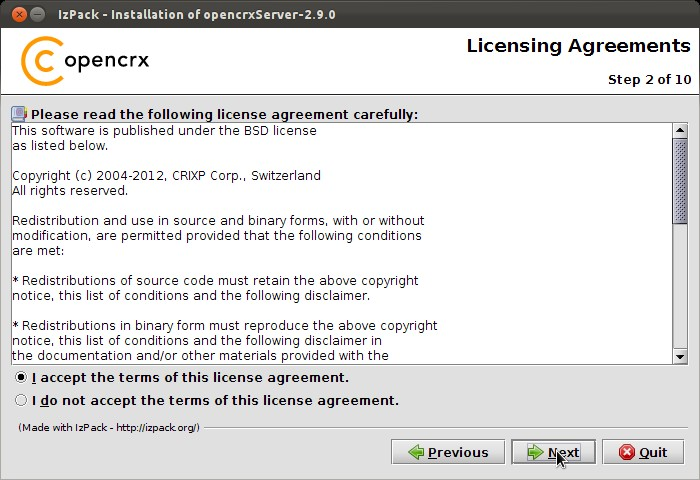
Accept the BSD License Agreement and click [Next] again:
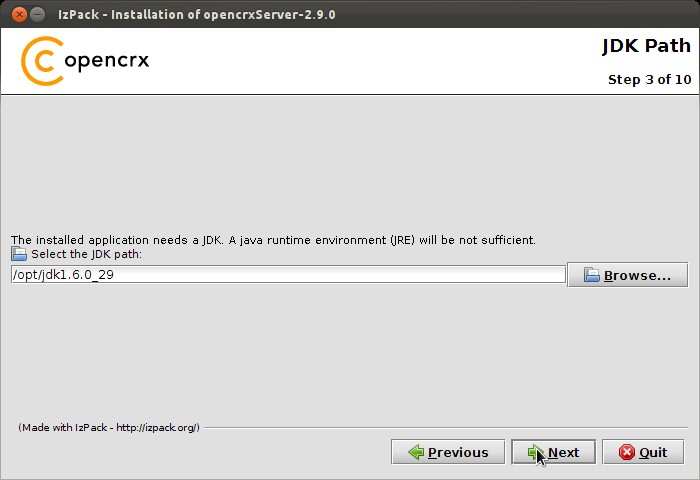
Select the home directory of your JDK 1.6 installation (automatically selected if the environment variable “JAVA_HOME” is set correctly) - for example /opt/jdk1.6.0_29 - and then click [Next] to continue:
Select the home directory of your Ant installation (automatically selected if the environment variable “ANT_HOME” is set correctly) – for example
/opt/apache-ant-1.8.4 - and then click [Next] to continue: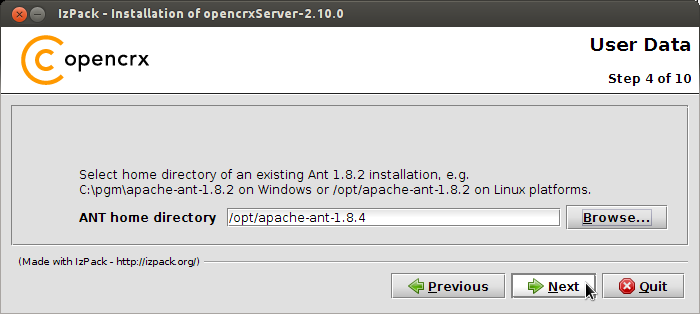
Select the installation directory – for example
/home/crx/opencrxServer-2.10.0 - and then click [Next] to continue: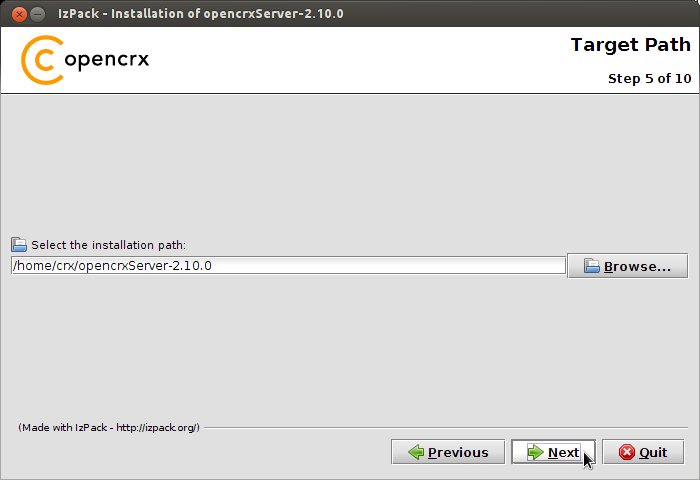
Verify the configuration data and then click [Next] to continue:
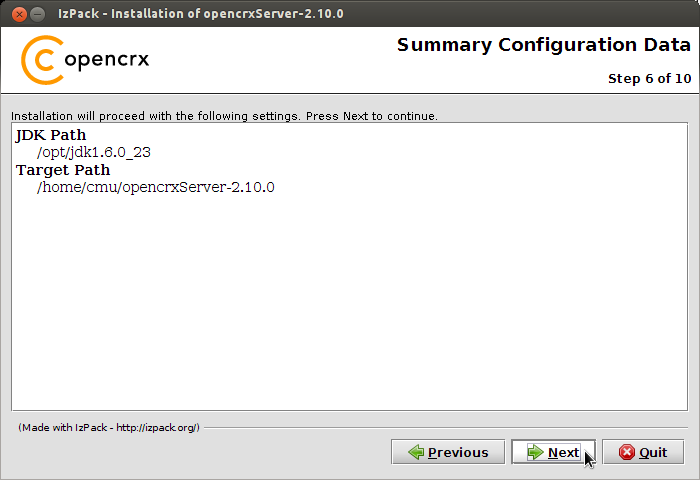
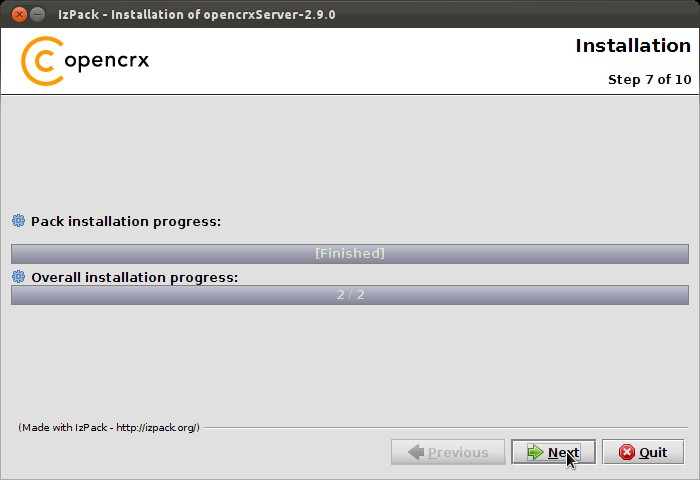
openCRX Server is now being installed. Once the installation process has completed, click [Next] to continue:
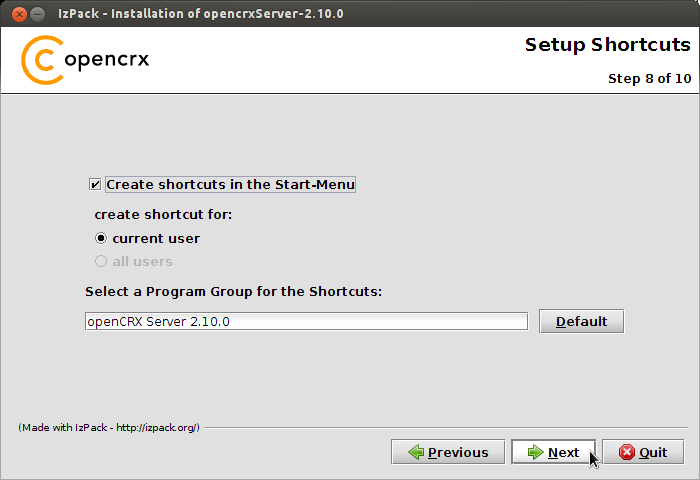
If you want the installer to create shortcuts, select options as shown below and then click [Next] to continue:
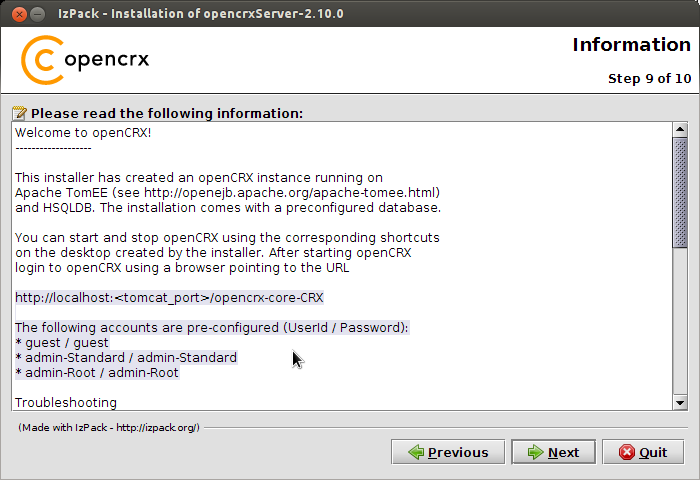
Carefully read the README, in particular information about valid URLs, preconfigured users and passwords. Click [Next] to continue:
Finally, click [Done] to finish:

The installer created a few shortcuts in your application menu (not on the Mac, as IzPack is unfortunately not able to create shortcuts on the Mac):

That's it for the installation. Move on to chapter 4 (Running openCRX Server).
4 Running openCRX Server
The installation process created various shortcuts in your Windows Start Menu (shortcuts/launchers in your application directory on Linux). Your version numbers might be different depending on the Tomcat version included in the installer:
|
|
Start TomEE with openCRX Server |
|
|
Stop TomEE with openCRX Server |
|
|
Start HSQLDB |
|
|
Stop HSQLDB |
|
|
Launch HSQLDB Management Console |
4.1 Starting openCRX Server
Launch the shortcut
![]() [Start
openCRX Server 2.10.0 (8080)].
[Start
openCRX Server 2.10.0 (8080)].
|
|
If you did not create the shortcuts (or if the installer could not create them) you can start openCRX Server with the command ./opencrx.sh run (Linux, Mac) opencrx.bat run (Windows) directly from a console (Terminal
window, DOS window) once you have navigated to the openCRX Server
installation directcory,
e.g. Please note that on Linux/Mac platforms you might have to start the server with elevated rights, e.g. sudo ./opencrx.sh run |
4.2 Connecting and Login
Launch your browser and load the URL
http://localhost:8080/opencrx-core-CRX/
If you want to load the login page in a specific language, see information at http://www.opencrx.org/faq.htm#login on how to do it.
|
|
Initialization takes place during the first login after (re)starting Tomcat, so please be patient. Subsequent logins will be very fast. |
4.3 Stopping openCRX Server
Launch the shortcut
![]() [Stop
openCRX Server 2.10.0 (8080)].
[Stop
openCRX Server 2.10.0 (8080)].
5 Next Steps
Now that you have successfully installed openCRX you might want to have a look at some of the additional documentation published at http://www.opencrx.org/documents.htm.
5.1 Migrating from HSQLDB to the DBMS of your choice
|
|
Please note that the openCRX Server Installer installed HSQLDB. This DBMS is perfect for testing purposes. However, as all data is kept in memory while HSQLDB is running, we do not recommend to use this setup in a production environment due to potential data loss in case of a power outage, etc. |
If you intend to use openCRX in a production environment it is recommended that you migrate (see Wiki) to one of the recommended database management systems (see http://www.opencrx.org/faq.htm#db for more information).
5.2 Securing your installation
|
|
Please note that the openCRX Server Installer installed Apache Tomee (Apache Tomcat w/ OpenEJB) pretty much as it is distributed, i.e. no hardening like closing of shutdown ports, etc. is done. It is not recommended that you run such a configuration for production use. |
If you intend to use openCRX in a production environment it is recommended that you harden/secure Apache TomEE. Apache provides a good starting point to read up on security:
http://tomcat.apache.org/tomcat-7.0-doc/security-howto.html.
License
The contents of this file are
subject to a BSD license (the "License"); you may not use
this file except in compliance with the License. You may obtain a
copy of the License at http://
Copyright 2012 ©
CRIXP Corp. All rights reserved. ![]()

